Zapier Integration instructions
A step-by-step guide to integrate Mailcheck with daily services using Zapier

Fara M
Last Update il y a 3 ans
Zapier helps to configure several services to work in conjunction with Mailcheck. With the help of Zapier around 2000 apps can get their emails validated.
Using Mailcheck with Zapier here is what you need:
- A Zapier account: create an account or sign up for free - it usually has limited features, however, Mailcheck will be creating a Zap that works with a free Zapier account
- A Mailcheck account (with the API key): In your Mailcheck Account access your dashboard, click “API” from the top menu, enter the key name and copy the API key
- A Google account: and spreadsheet in Google Drive, before you begin please set the following columns and headers:
- Email - this is the source where Zapier will get your emails from
- Status or Trust rate - Mailcheck Validation results
Now let’s proceed to the step-by-step instructions:
- Email - this is the source where Zapier will get your emails from
- Status or Trust rate - Mailcheck Validation results
Now let’s proceed to the step-by-step instructions:
Step 1:
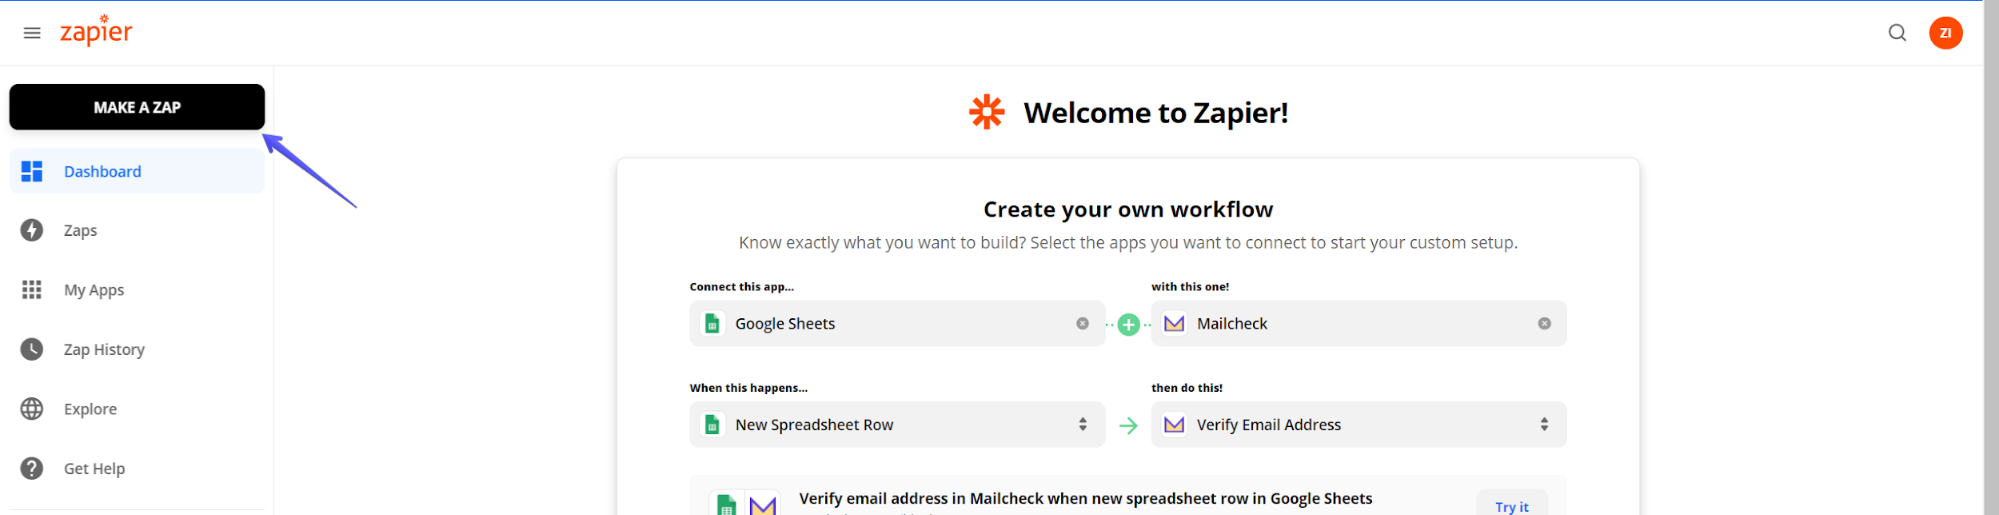
Open your Zapier account and log in. Choose “+” or “Make a Zap”.
Step 2:
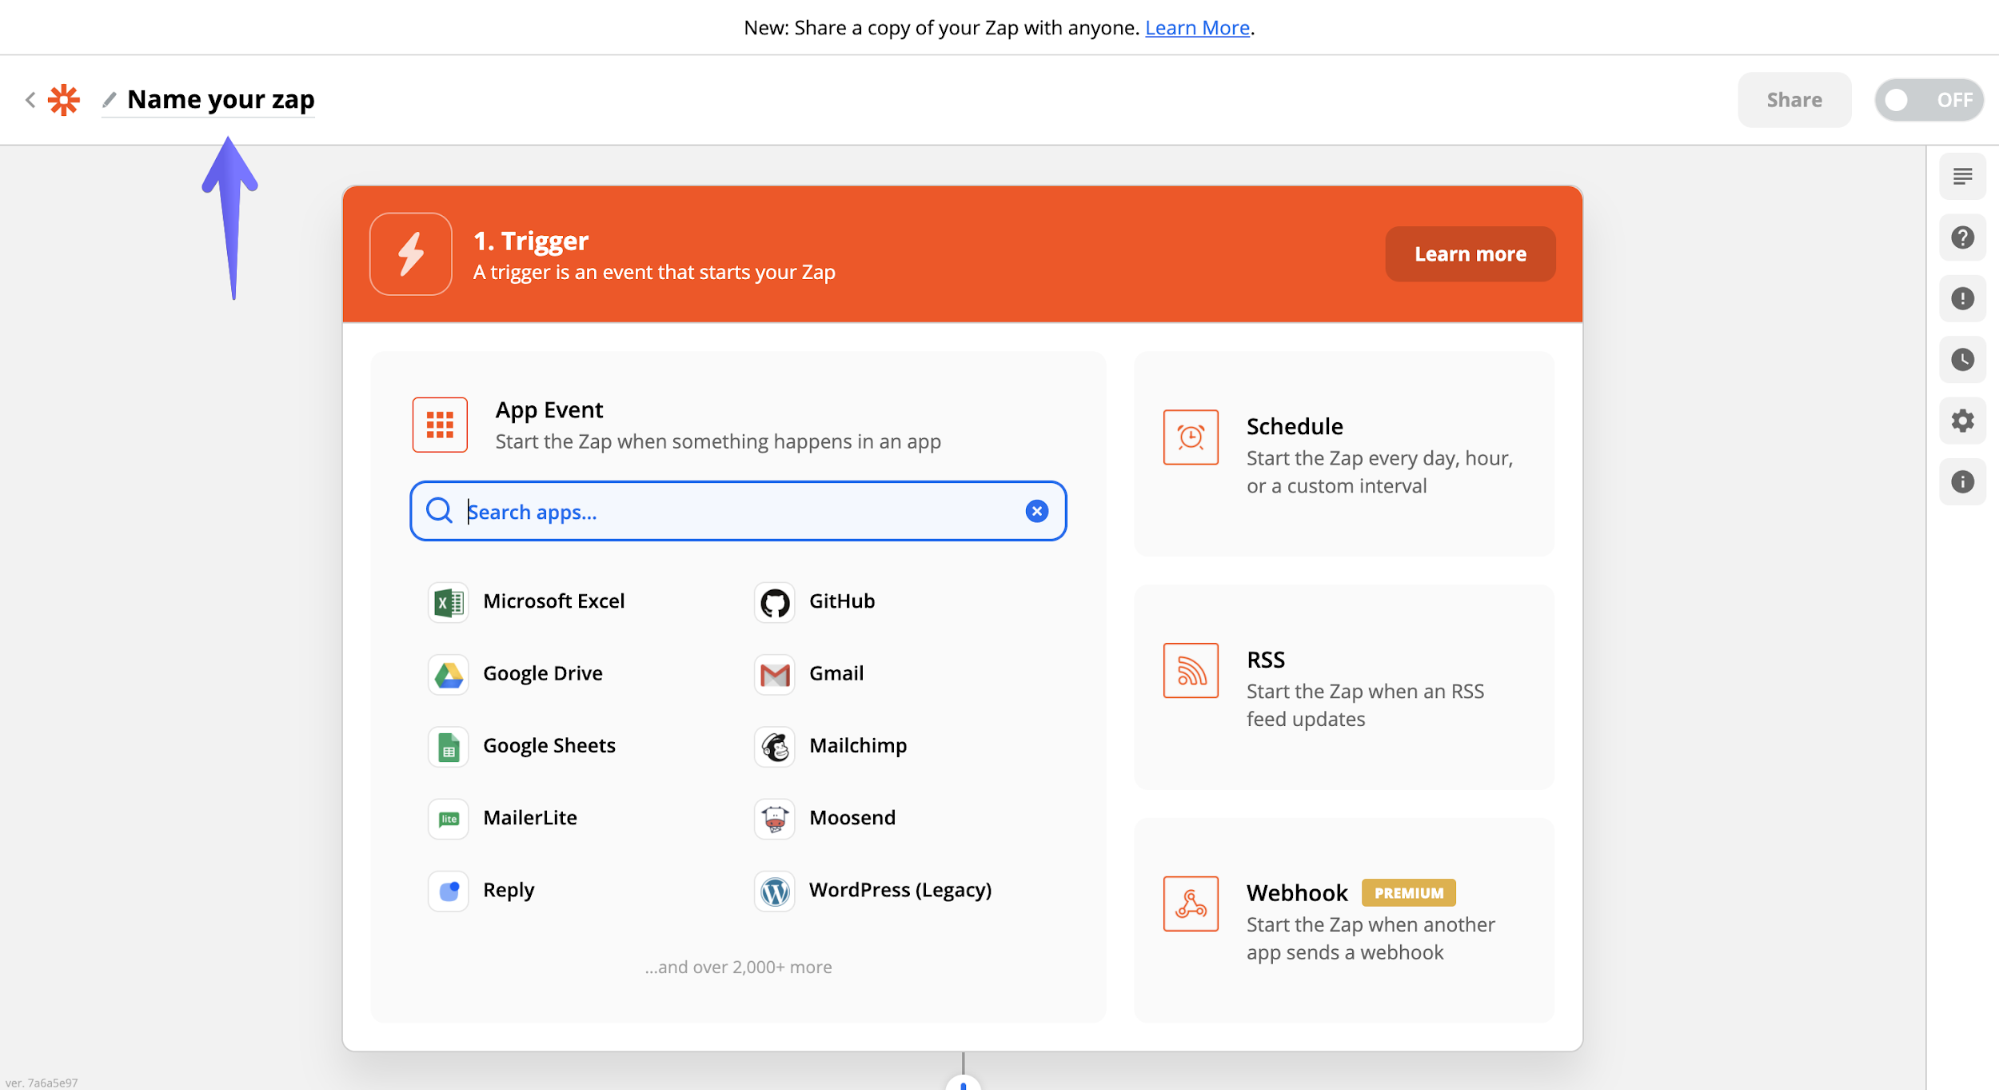
You can add a name to your zap just click on “Name your Zap”.
Step 3:
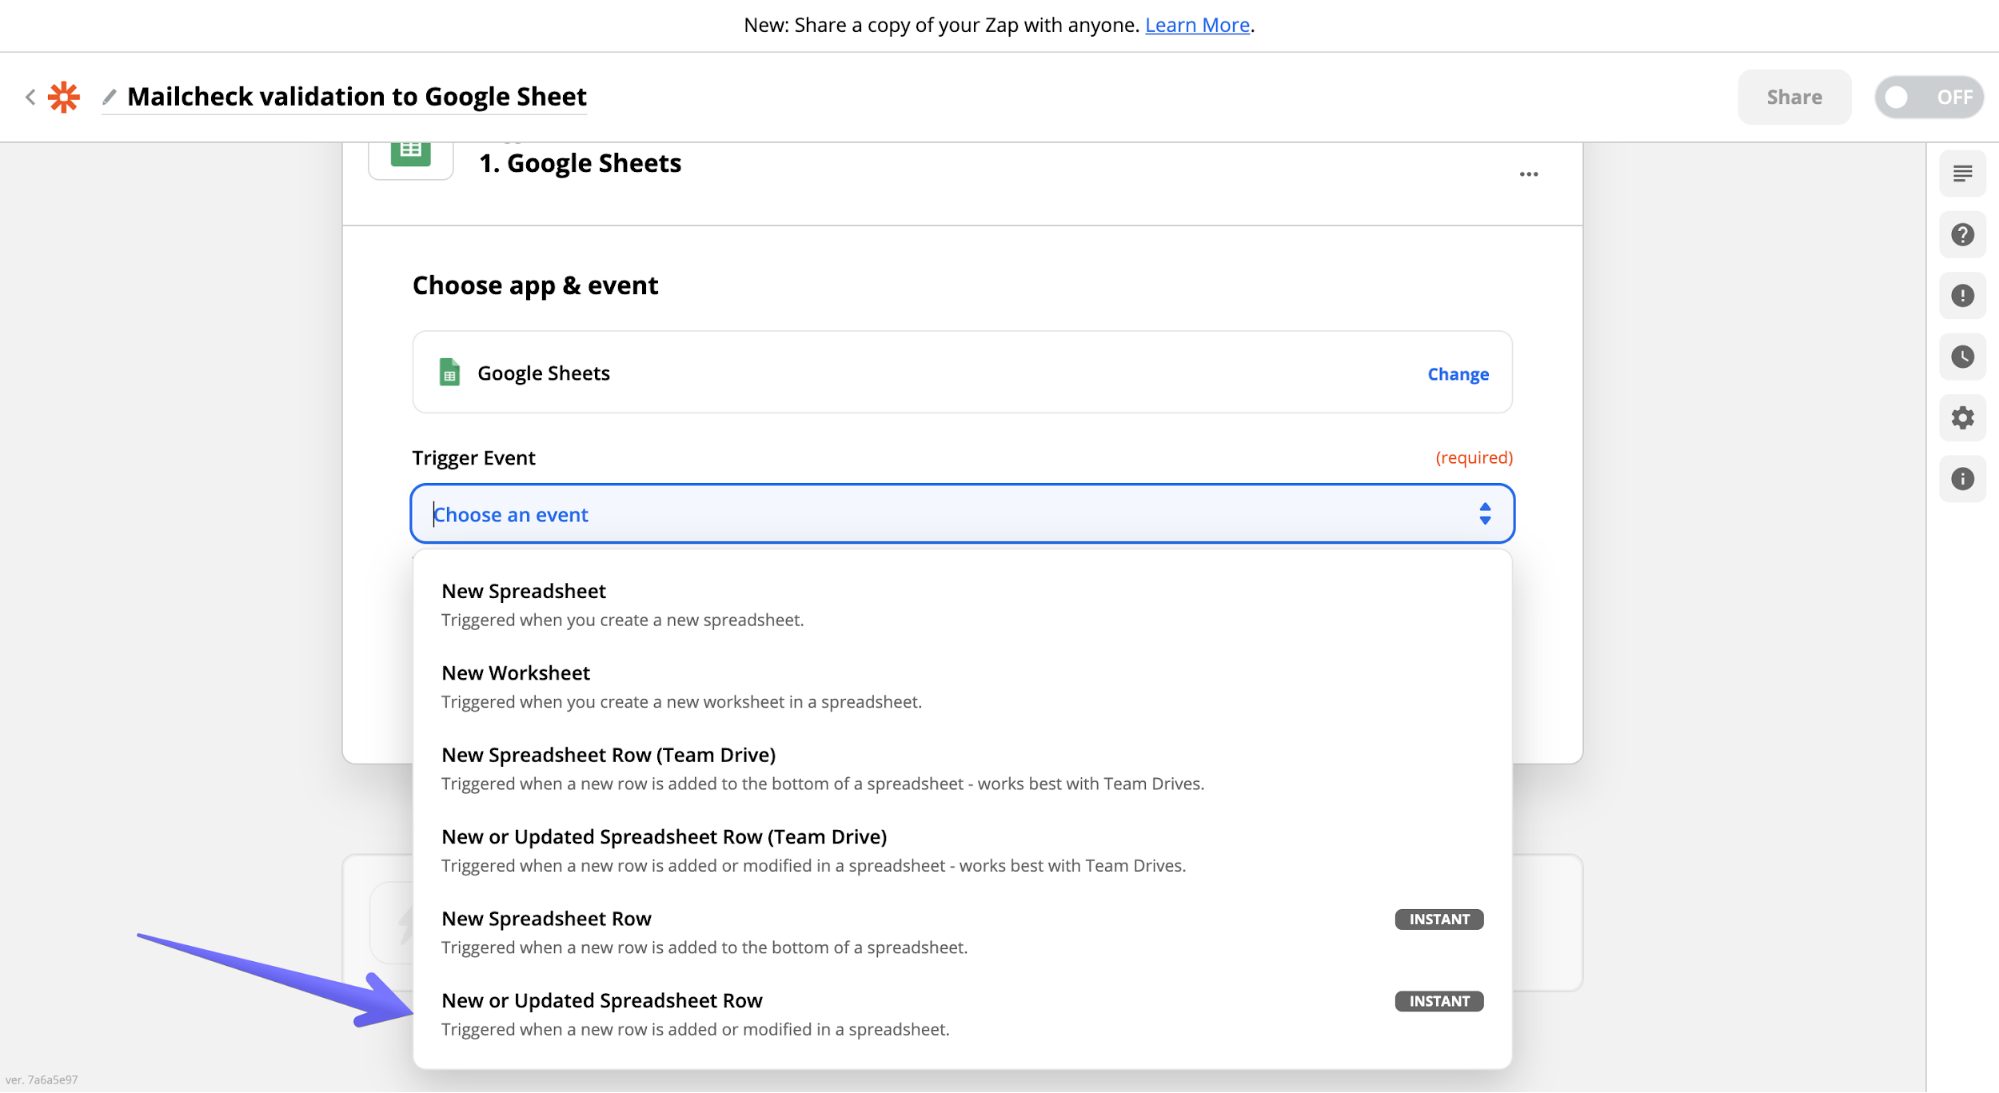
On the “Choose app & event” section click on “Google Sheets”.

Step 4:
The next thing is to trigger “New or Updated Spreadsheet Row”, then tap “Continue”.
Step 5:
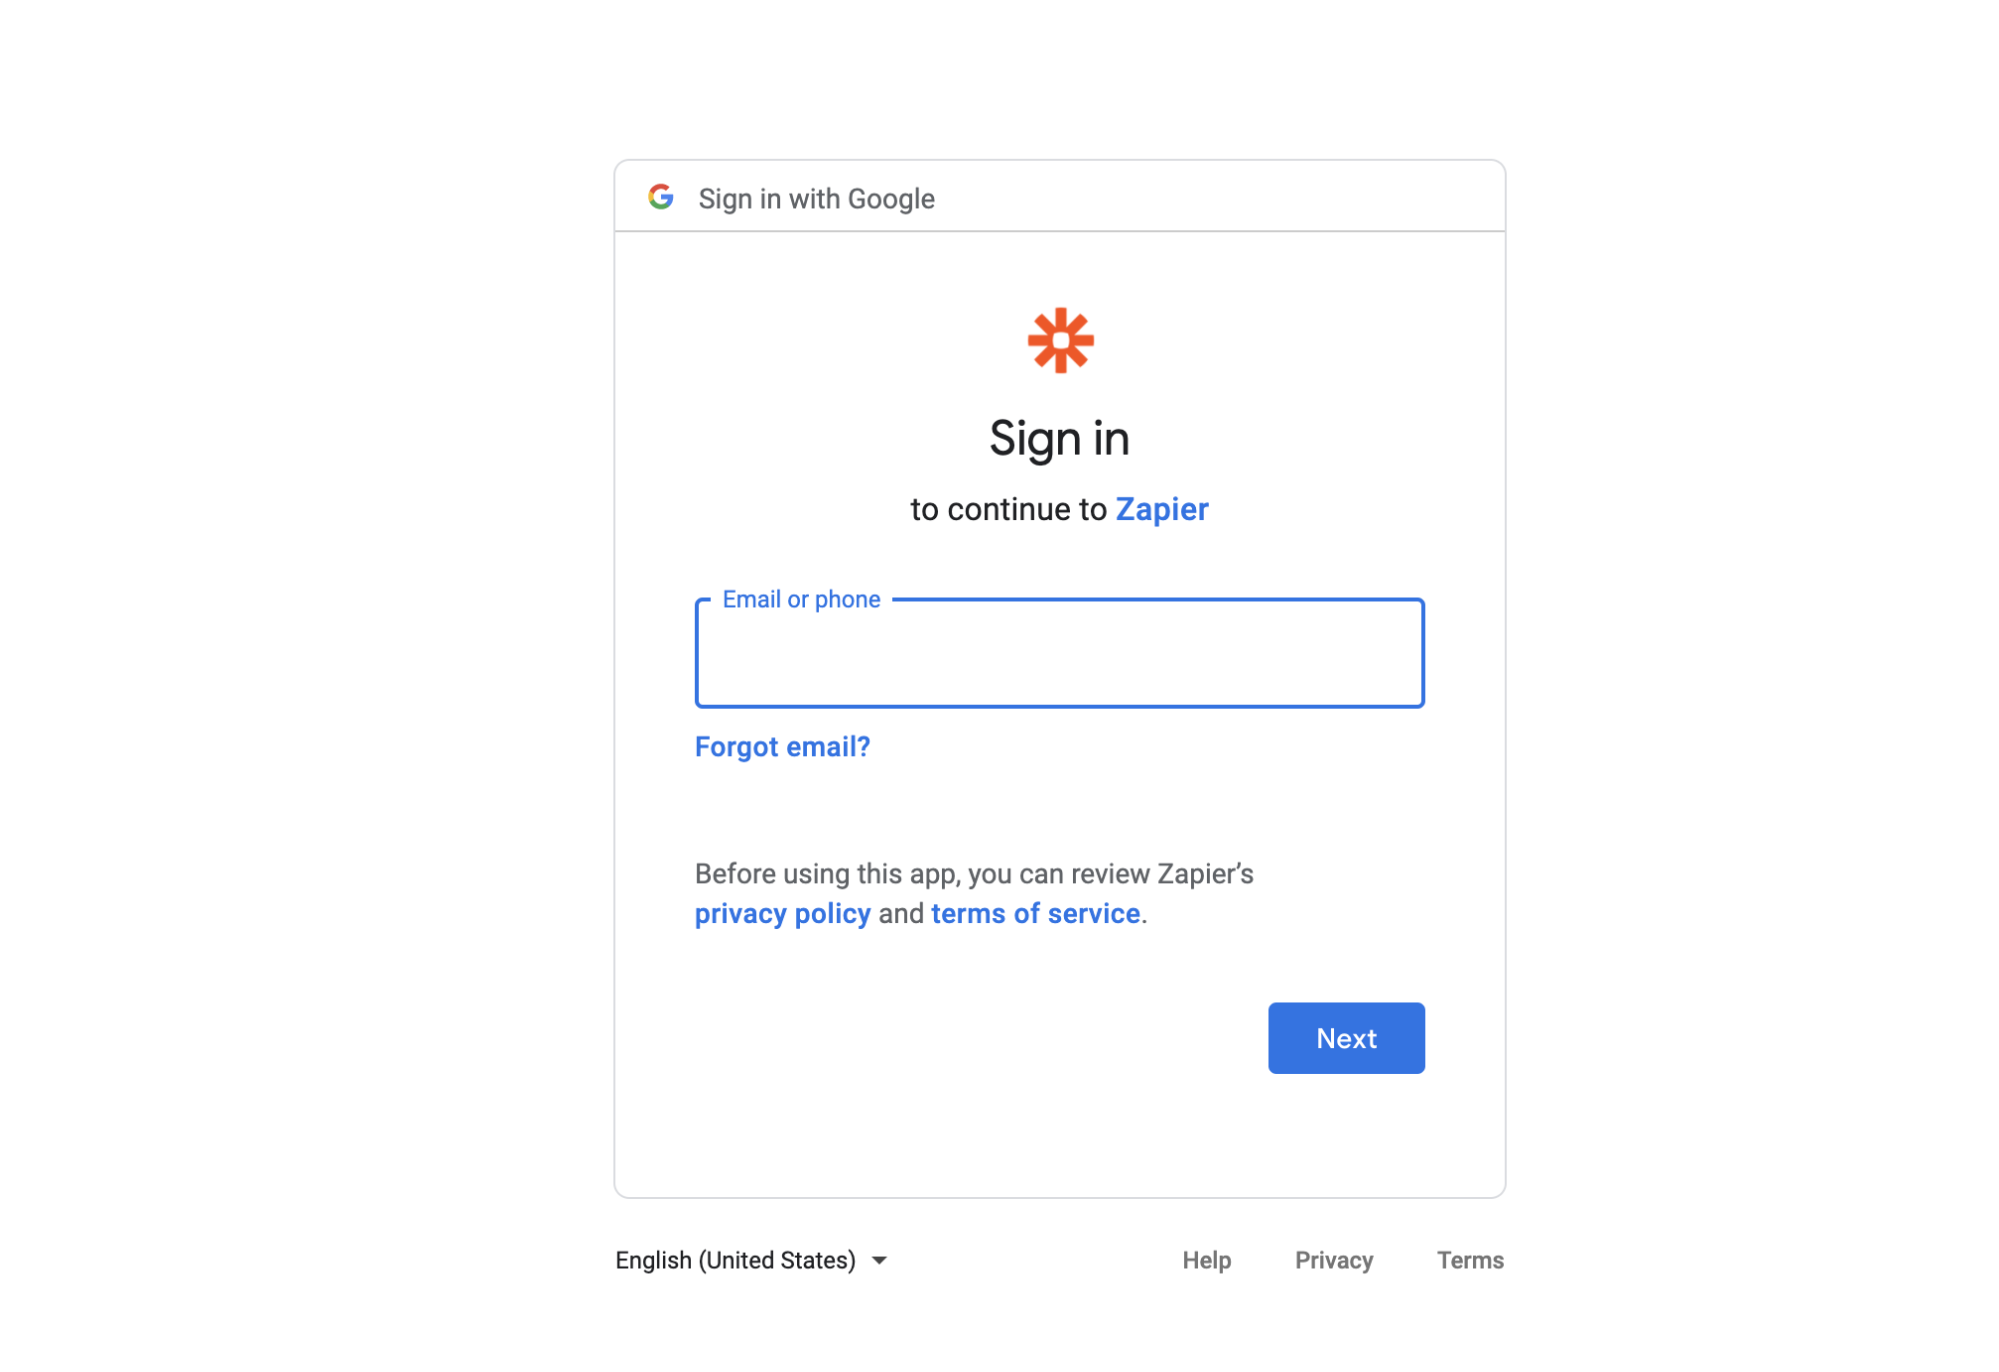
Tap “Choose Account” and connect your Google account to get your Google Sheet information

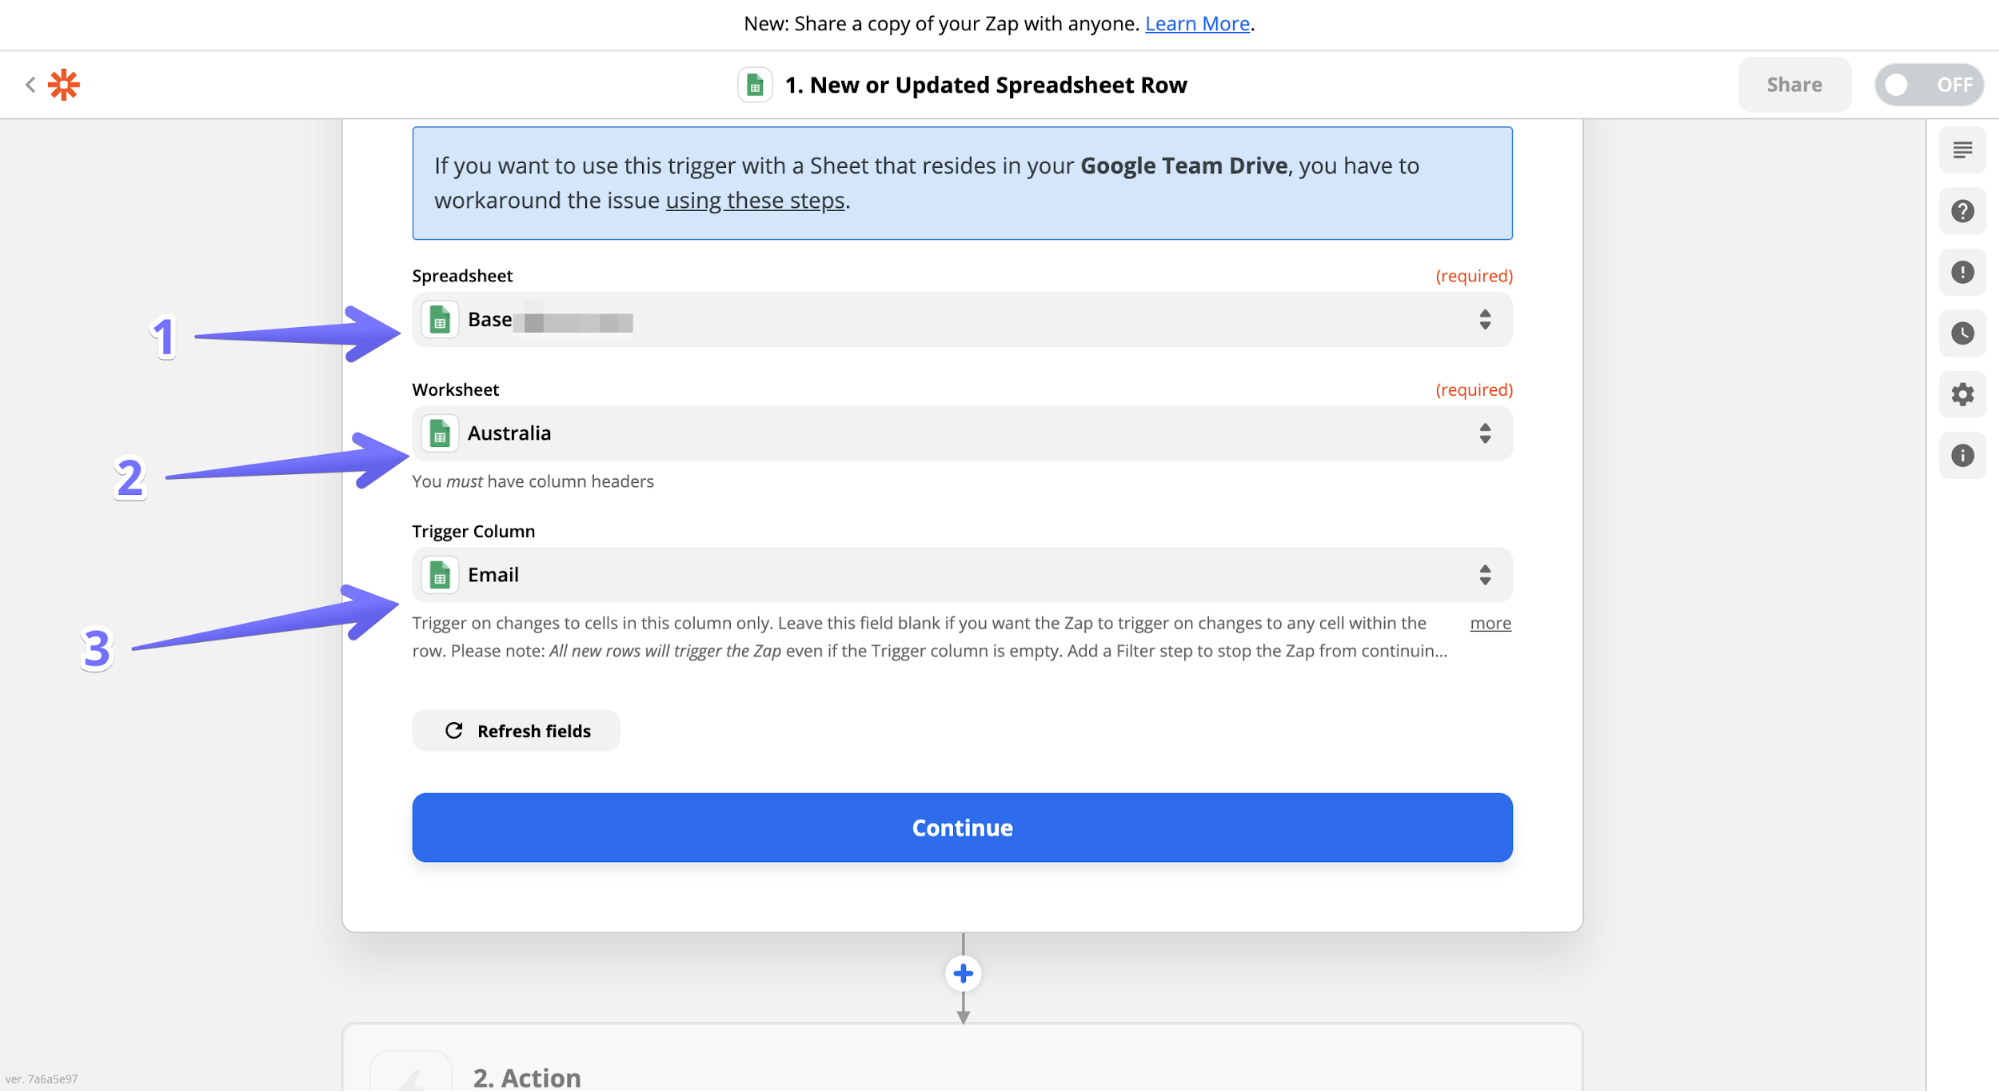
Step 6:
Choose a spreadsheet you require for the validation
Choose the worksheet
For the Trigger Column always choose “Email”
Then, tap “Continue”.
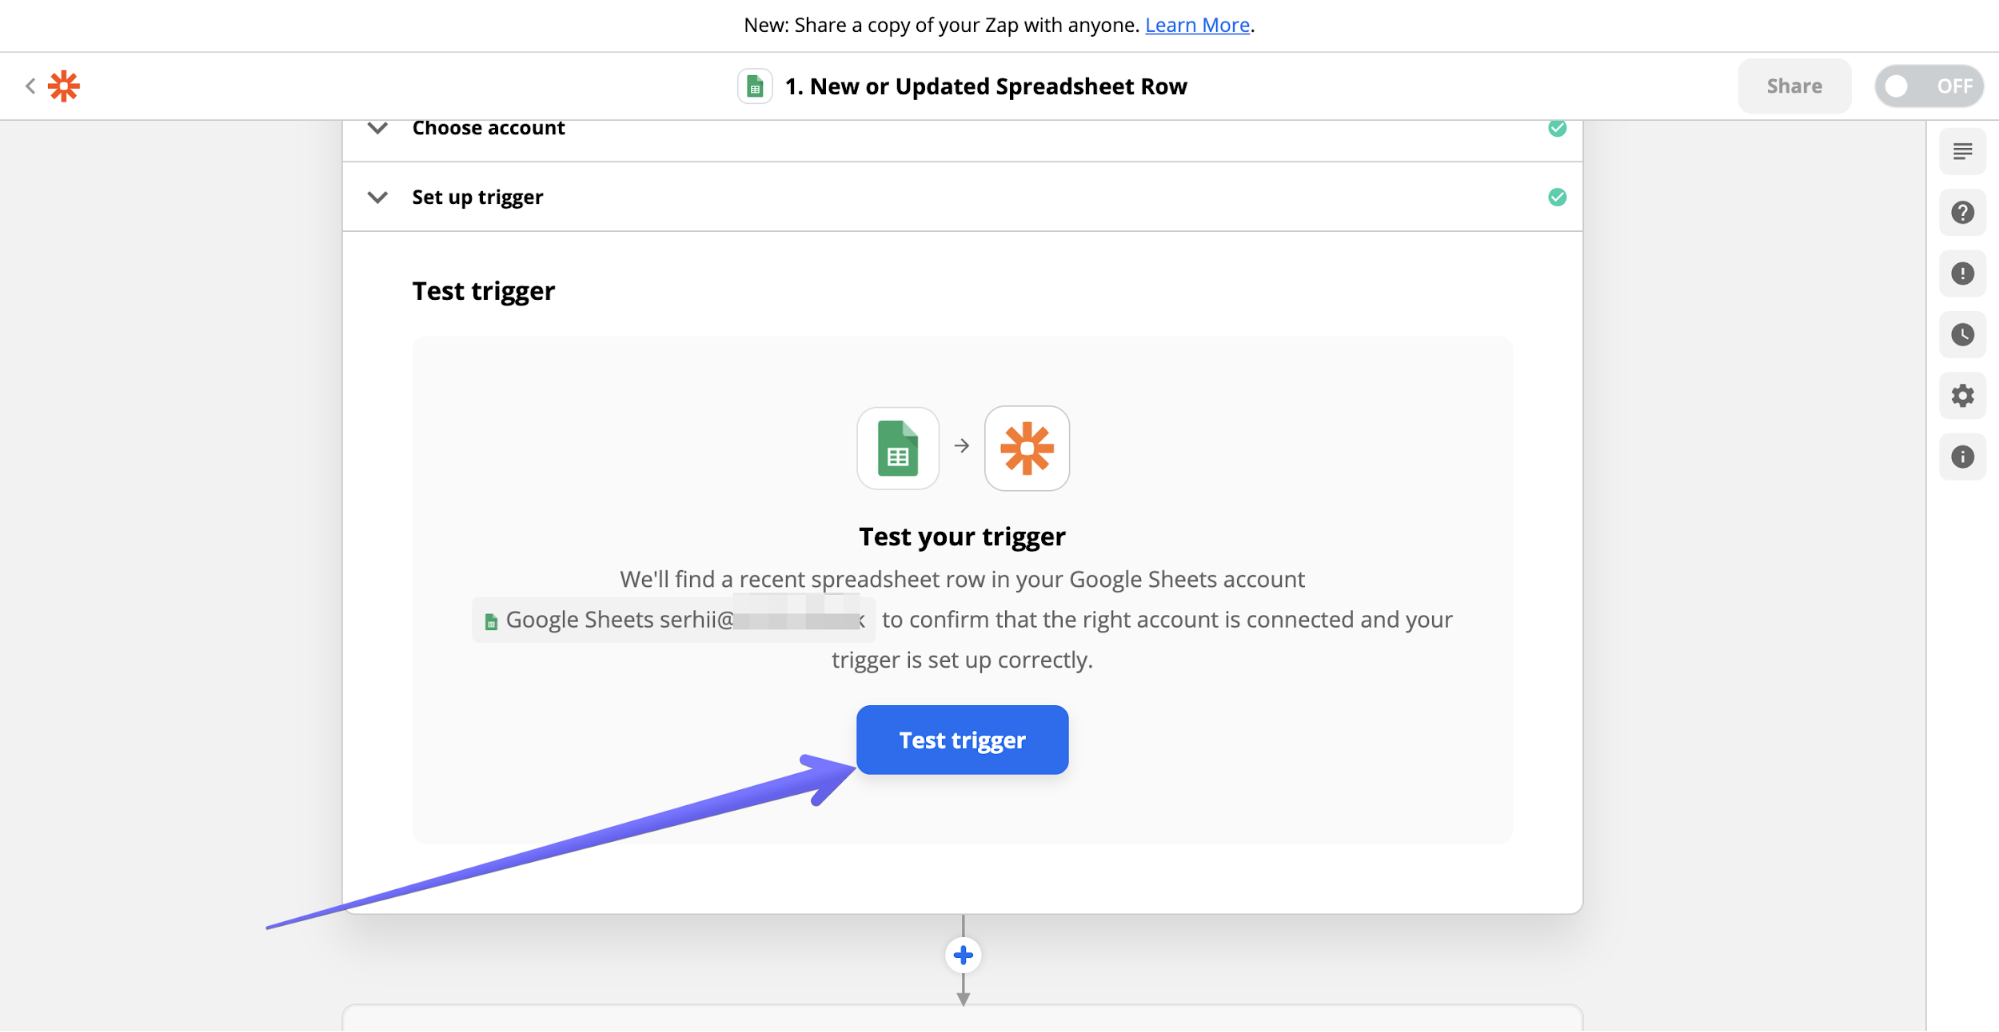
Step 7:
Click “Test your trigger”. A summary of the trigger setup will be displayed. Peruse the details to see if everything is correct. Then, click “Done Editing”. Action section will pop up if every detail is in order. Otherwise, an error message will be displayed. In such a case, re-check the settings from the past steps, make the necessary corrections, then perform the test again. Now that the setup is correct, choose “Continue”.
Step 8:
It is time to establish the Action. Please find “Mailcheck” in the search field and select it

Step 9:
Here, the only actionable option will be “Verify Email Address,” which has been chosen already. Tap “Continue”, followed by “Choose Account”. This will help link your Mailcheck account. In the subsequent page, type in your API key – you can generate your API key under the API section in your mailcheck account. Next, select “Yes, continue”.

Step 10:
At this stage, you have to establish Mailcheck account, click “Choose an account” and click on “connect a new account”


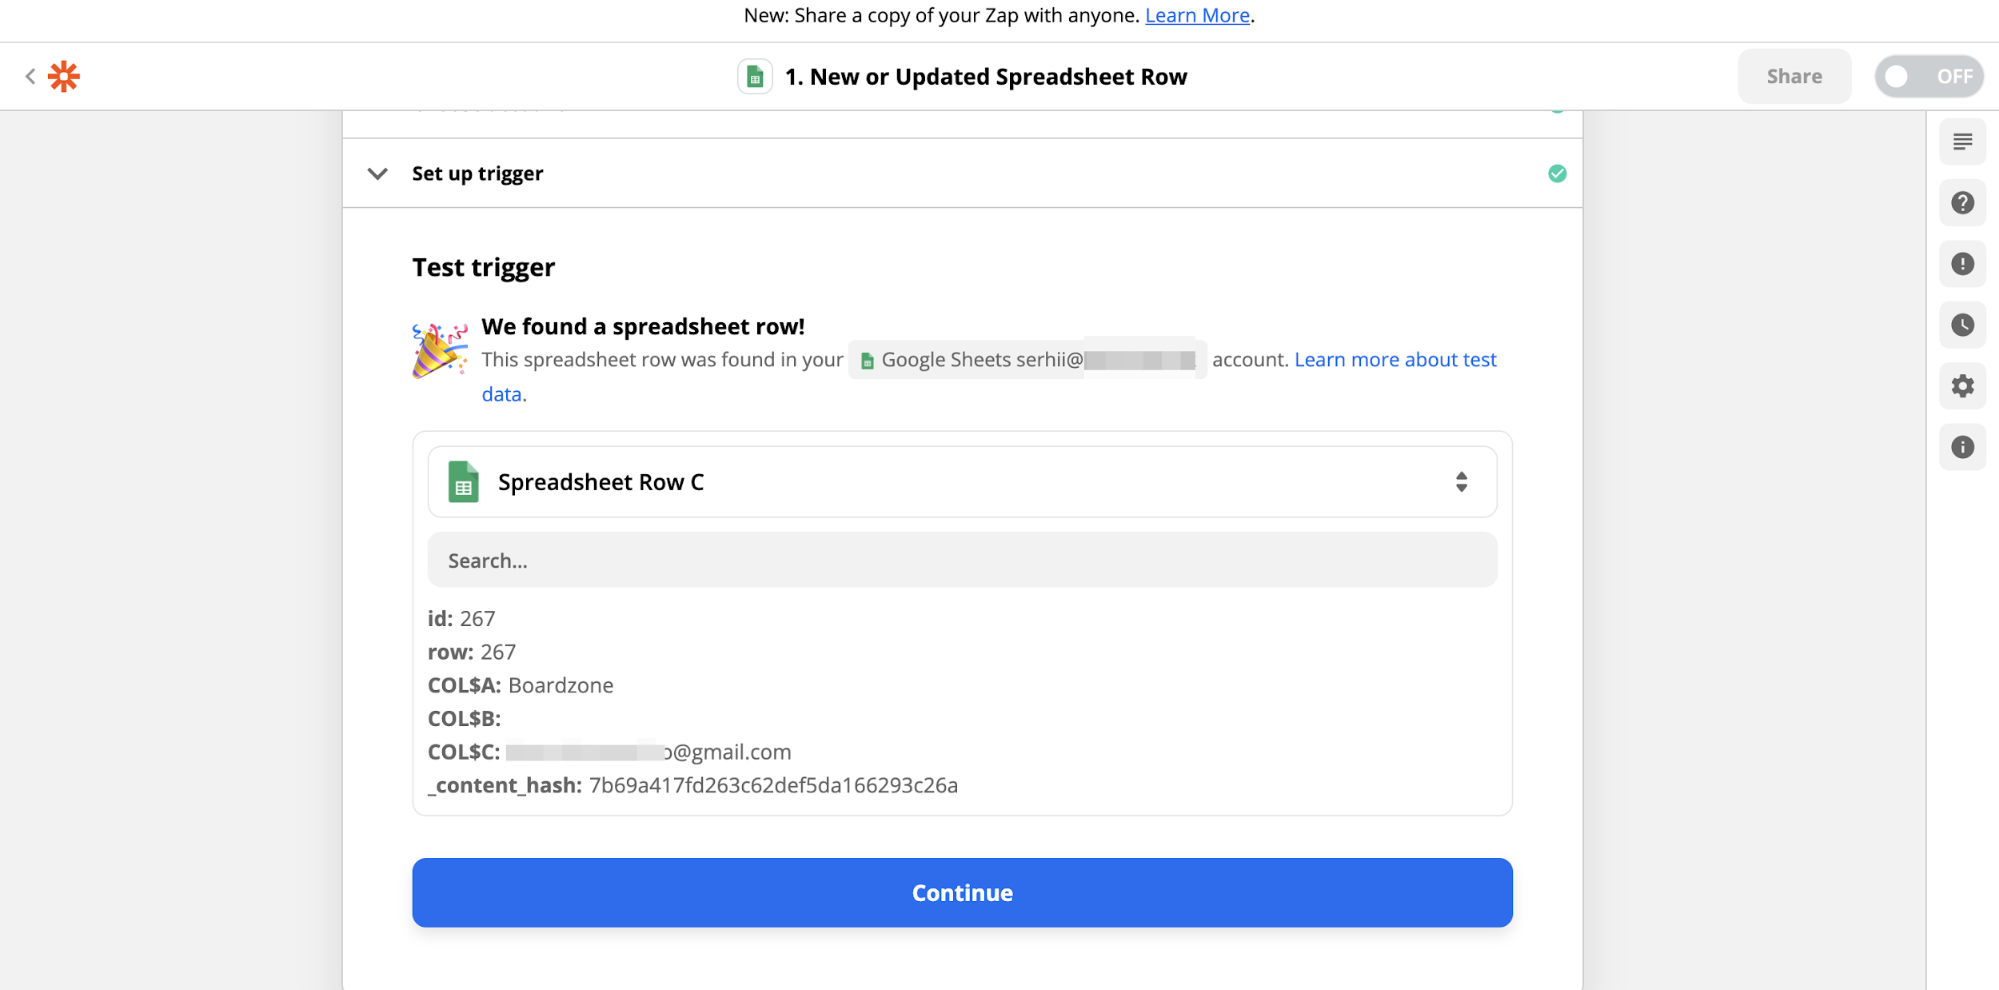
Step 11:
After a successful Mailcheck API key procedure, choose the right email data from the drop-down list, click “Continue” proceed with “test and review”
As the screenshot indicates, the test was successful, so you have the validated data in Mailcheck

Step 12:
You can turn on Zap and close or export the results back to Google Sheets

Step 13:
In order to receive back the validation results to the Google sheet we need to establish another action, for that please click “+” as indicated in the screenshot

Step 14:
You need to choose Google Sheets again

Step 15:
Action event must be the “Update Spreadsheet Row” because we will be updating the row with “trust rate” and “validation status” results.

Step 16:
Once the “Action Event” has been chosen, please click “Continue” and choose your Google Sheet account

Step 17:
Same as we set for step 6, we are going to choose your Google Drive (1)
Select the spreadsheet similar to step 6 make sure you have chosen the exactly same name of the spreadsheet file that you’ve selected above (2)
And choose your worksheet similar to step 6 (3)

Step 18:
When choosing the row, please select “Custom” then choose "New or Updated Spreadsheet Row in Google Sheets" -> final step choose Row ID


Step 19:
Find “Result” field, click on “verify email address in Mailcheck” choose “Status” proceed with “Continue”
Step 20
Just click on “test and continue”
Step 21
At this point, we can activate our Zap

Step 22:
Let’s perform manual tests to ensure everything is working properly.

Note: The operation explained above is one of the several ways to use a Zapier in collaboration with Mailcheck.
However, the fundamental principles remain the same. Zapier’s library contains more than 2,000 online apps, which means that they are likely to support the CRM or ESP which you are currently using.
Be creative while exploring the endless possibilities of Zapier. If you ever encounter any issues, kindly get in touch with our LiveChat support team for proper assistance.